Showing posts with label Kaszazz. Show all posts

Saturday, 2 April 2016

Kraft Plus April

Hello my friends,

I hope you are enjoying the start of the month and all the new challenges out there. I know, I had a quick peak and they are all awesome, it's kind of hard to decide where to start. However, one I always look forward to, is the Kraft plus challenge.

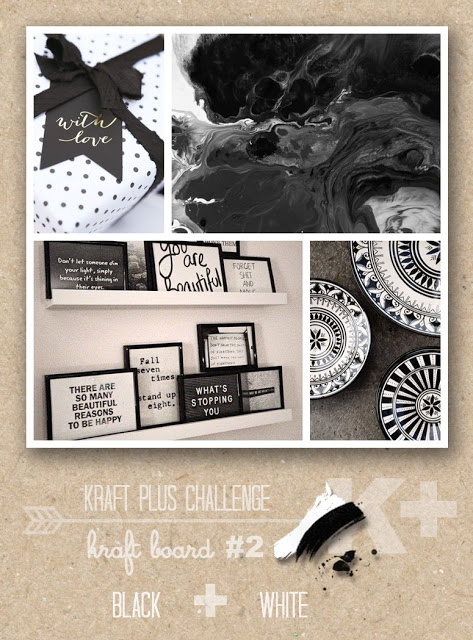
This month we have Kraft plus a Black and White mood board and oh boy, I just loved this. You should also check out the work of my fellow design team members. Looking at everyone's creations, you can tell, we all had lots of fun doing this one.You just have to  hop over to the blog to believe me.

Challenge:


My take on the challenge:


Details:


Once I've started creating this background. Once got started,  I could not get myself to stop. So guess what....? I have at least 3 more backgrounds like this, just waiting to be used for something. :)

This layout was inspired by the very clever Anita Rodway and I just love what that girl does with paint, so be sure to check out her blog.

I can't wait to see what you create, so come and join us this month.
Till then, happy crafting my friends xx

Products:
Kraft Paper — Francheville & Kaiser Kraft, Stamps — Kaszazz, Die —Heidi Swapp, Flower and brads Kaszazz. Embellishments (cogs) — Prima, Word phrases (Tim Holtz).


Monday, 11 May 2015

Off the Rails Challenge – May

Hello everyone

I'm back, with another May challenge. This time it is Off The Rails Scrapbooking. This one really sparked my mojo and nudged to do more work using red. All my current ideas have red or black in them... mmm what's next?

Please hop over and check out the moodboard at http://offtherailsscrapbooking.blogspot.com.au/2015/05/may-challenge.html and check out  the work of the design team.

Here is the moodboard:


My take on the challenge:


I absolutely loved adding all the different chipboard pieces in different colours and metal bits to suit the theme.

Here are some close up details:


Product List: Paper –Kaszazz; Chipboard –Scrap Matrix; Gesso – Ranger; Metal Embellishments – Prima, Scrap Matrix; Acrylic Paint –Studio Artist, Embossing Powder - Ranger & Inkadinkado, Photo – Tania Ballestrin.

Thank you so much for stopping by.

Cheers till next time

Anguree

Saturday, 31 May 2014

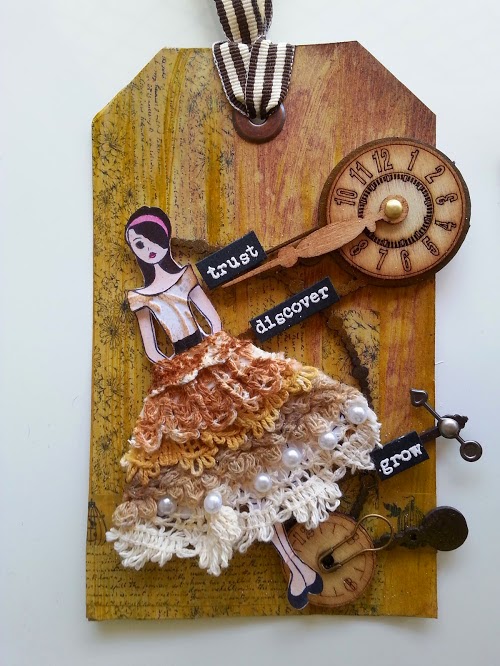
Vintage Annie Tags

Hi everyone,

Time for another set of tags, I've been working on. All the products are in the current Kaszazz Catalog, so please let me know if you like to order anything or if you would like to know more on how to create these yourself.  I've also put them on the potential customer projects site for Kaszazz, so please keep your fingers crossed that it gets accepted.

I just loved these little Annie stamps, and as you may have noted in my latest posts, I've grown quite fond of them, no matter if they are big or small.


Products: Kaszazz Tags, Kaszazz stamps, Kaszazz embossing folders, chipboard, Tim Holtz Distress Stain and Distress Paint, Washi tape, Lace,pearls, Kaszazz patterned paper, Kaszazz Embellishments

Sunday, 13 April 2014

12 Tags of 2014 April

Hello everyone

Hope you are doing well. Time certainly flies and I do apologise for my absence over the last month. Things have been a little bit hectic and I have been running workshops for 3 weekends in a row. This is my first weekend "off" and also time to clean up the scraproom and get organised again. It's surprising how quickly order turns into chaos if you just go from one project to another, without cleaning up properly...

I am however happy that even though the chaos, I managed to squeeze a few hours in for Tim's monthly tag challenge.This is my definitely my favourite challenge each month. The anticipation to see what he creates every time, is a huge creative boost and a kickstart for the mojo. Then comes the exciting part to come up with a tag using the same techniques he did. And what a lovely tag he created this month, it's almost impossible to resist the urge to give it a go yourself. Check out his tag below, or click here to see how exactly he's done it.


So again, my tag does not look anything like his. Surprize?, Not... Okay, I did not have any of the framelits dies or pinecone die. That's not to say that they aren't on my wishlist, I want them all lol...


So here is my version:


So without the essentials I had to view my stash in a different light - how could I come up with something similar? Well, I thought, I do have the Tim Holtz Vintage Market Alphabet, I have all the paints and washi tape and quite a few of the Distress Ink Pads, so let's see.

At first I tried my very best to cut through grunge board, but the Sizzlit dies are just not made for that sort of thing, but it's a Tim Holtz die, so I gave it my best shot. I ended up squeezing the foam a bit, but like with all of the products in the range, the quality is outstanding and as result it still works without fail. I really believe if it's a Tim Holtz product, you may try and do the impossible and if the idea occasionally don't work, the product will withstain your efforts. So in the end I cut through white card and which I painted, sanded lightly and inked. To add the 3D dimension to it, I carefully stuck it to my tag by using mounting tape and did the same with all my number and letters, which I cut from coloured foil and a Tim Holtz patterned paper.

The flowers was created by stamping my coloured foil with a Kaszazz newsprint stamp, using the black Archival ink. Once I heatsetted it, it cut out the flowers using 2 of My Favourite Things, Dynamic Dies.
Curling the foil is not hard but the unraveling to form the flowers is a tiny bit different than doing it with paper. On the positive side you do not need any glue or sticky dots at the bottom, as the metal holds it's shape once bended. I then created leaves by cutting a trinket into 4 different bits.

The photo is a old photo of mom when she was still at school and to give it some dimention, I added loads of Glossy Accents and let it dry over night.


The pin I used was either a trinket I got from Scrap Matrix or something I found quite a while ago. Whilst playing with ideas and beads to include my "journaling" I found some Dome Stickers I bought many years ago. It just clicked and I realised that this little sticker was the perfect piece I needed to complete my tag. So there you go, go searching through old supplies, and you may be surprised at how many useful things you will find.


Hope you enjoyed this month's challenge as much as I had. Till next time, have fun and have a blessed Easter, whatever you are planning to do.

Product List:
Tim Holtz Distress Ink Pads, Tim Holtz Distress Paint, Tim Holtz Washi tape, Dome Stickers, Spellbinders Media Mixage Foil  MM1-002, Scrap Matrix Trinkets, Scrap Matrix Hessian Ribbon,  My Favourite Things Dynamic Dies, Kaszazz Newsprint Stamp, Cork, Glossy Accents, Helmar 450 Glue 

Saturday, 8 March 2014

12 Tags of 2014 - March

Hi everyone

It's time to get creative and complete another tag for Tim's 12 Tags of 2014 Challenge. If I have to be honest I would admit that I struggled to get motivated this month. Instead of doing mine straight away, I took a while to ponder over a few ideas. Thumbs up for everyone else who has already participated this month. You lovely ladies certainly helped  to get the mojo flowing again and inspired me to think a bit out of the box. To make it even better, I have now officially joined as a Kaszazz Consultant and was thrilled to receive my startup kits and beautiful new toys. That was all I needed and as they say, the rest is history. It took me 2 week nights to design, create and get everything just right (Yes, I had a couple of tries to make sure all is just the way I wanted, no ink stains, no spills and no other unforeseen little boo-boos :) ) So what started out as quite a brainteaser, turned out to be loads of fun and something I'd definitely try again. Thanks Tim!


So this is what Tim created this month:


You can check out the techniques he used by clicking here


My take on the challenge:

I did not have a airgun, so I just spraed diluted dylusions ink from further away. Also, the brown ink I used, turned to be quite pinkish, but it worked beautifully for my purposes. :)


Product List:
Tag: Kaszazz
Other: Distress Ink Pad- Tim Holtz, Dylusions ink spray mixed with water- Ranger, Staz on Ink, Distress Markers-Tim Holtz, Glossy Accents- Ranger, Acetate- Kaszazz, Stencil- Kaszazz, Stamps- Kaszazz, Ribbon Charms - Kaszazz, Tissue paper-Kaszazz; Twine- Kaszazz; Washi tape-Kaszazz; eyelets, circle punch-Kaszazz

Wednesday, 5 March 2014

Get me to the church on time

Hello again

Wow, time just seem to fly, I can't believe we are in March already. It seems like yesterday I've done my first post February. I do hope that you have all had a wonderful 2 weeks again and that you all managed to get a bit crafty. I managed to squeeze in some time last Thursday night and scrapped till the early hours of Friday morning. Needless to say, I definitely paid for it the next day... Never the less I am quite pleased with what I've created, and would love to share it with you.


The title of this layout is based on the lyrics of an old song from the movie My Fair Lady, I recalled whilst scrapping the time away and the more I thought about it, the more I realised just how appropriate it was for my wedding 10 years ago. On our first arrival at the church my brother in law and I were told to leave again and go for a drive because everyone has not arrived as yet. Not too fussed about the idea we went off to check out the nearby suburbs. It so happened that our little drive took a wee bit longer than it should have and according to everyone else we were the ones who were late. It’s fair to say that although happy, my beloved husband did not find it amusing...

Get me to the church on time:


Product List:
Cardstock: Kaszazz Watercolour Paper, 7 Dots Studio
Other : Faber Castle Gelato’s, H2O Watercolour paints, Tattered Angels Glitter Spray; Liquitex Gel medium, Stencil - Kaiser Kraft; Washi Tape – Kaszazz; Lace- Kaszazz; Trinkets – Scrap Matrix & Kaszazz; Punches: Martha steward; Flowers- Prima &Little Birdie Burlap elements; Letters – Scrapbooking Collection
Other : Gelato’s, H2O Watercolour paints, Tattered Angels Glitter Spray; Liquitex Gel medium, Stencil - Kaiser Kraft; Washi Tape – Kaszazz; Lace- Kaszazz; Trinkets – Scrap Matrix & Kaszazz; Punches: Martha steward; Flowers- Prima &Little Birdie Burlap elements; Letters – Scrapbooking CollectionOther : Gelato’s, H2O Watercolour paints, Tattered Angels Glitter Spray; Liquitex Gel medium, Stencil - Kaiser Kraft; Washi Tape – Kaszazz; Lace- Kaszazz; Trinkets – Scrap Matrix & Kaszazz; Punches: Martha steward; Flowers- Prima &Little Birdie Burlap elements; Letters – Scrapbooking Collection; Photo: Jan Theron


Wednesday, 19 February 2014

Bo Bunny Zip-a-dee-doodle (part 1)

Hi Everyone

I just got back from a delightful 4 day weekend in Bali. We flew in to Darwin late on Sunday night and from there it was back to work. I hope you all had a great valentines day, if you celebrate it. (I only do because it's my wedding anniversary :) )

Over the next two weeks, I'd like to share 2 layouts I've created using the Zip-a-dee-doodle range from Bo Bunny. I fell in love with this beautiful range and could not stop after just one layout. This range is so colourful and joyous and just begs to be used on happy, fun filled layouts. I eventually ended up doing 3 layouts, of which one was published in this month's Scrapbooking Memories Magazine Vol 16(7) (This layout will not be featured in any of this month's posts, but may appear in the online gallery, at a later stage). 

The 3 of us:


*My apologies for this skew photo, just could not get it straight tonight lol...

Product List: Stamps – BoBunny; Paper – BoBunny; Stickers – BoBunny; Cardstock – 
Sam & Lucy ; Liquid Pearls – Ranger; Distress Ink – Ranger; Ink – Stazon; Embossing 
Powder – Inkadinkado and Stampin-Up; Ink Sprays – Tattered Angels and Lindy’s Stamp 
gang; Punches – Martha Steward, Friskars and Kaszazz; Dies – Impress; Rhinestones – 
Kaszazz and Kaiser Craft; Pens – Pilot and UBL; Glue-Helmar, Double sided tape,

 IDEAS/TIPS

• Use your paper scraps to punch boarders and sandwich them in-between your 
   cardstock layers.

• Out of patterned paper or embellishments? No problem, use your stamps to create: 
   -an interesting border around your page
   -a unique background
   -custom made embelishments

• No numbers in your stash of stickers? – convert the letter m to a 3 by snipping of 
  the line which forms the matting for your photos or your very own embellishments.

Wednesday, 5 February 2014

12 Tags of 2014 - February

Hello again

Another month has passed and it's February, which means it's time to create another tag for
Tim Holtz's 12 Tags of 2014 Challenge. For me, February is always such a special month, celebrating love, relationships and the birthday of a very special person. This year, Valentine, or the 14th is so much more as it marks my and my hubby's 10th wedding anniversary.  I really wanted to capture the essence of this event on my tag and as such my tag looks nothing like Tim's.  I'd dare to say there is a little bit more "me" in this one.

You can have a look at Tim's tag below or hop over to his blog by clicking on the photo for a step by step tutorial to create it just the way he did. (Naturally he could not but help to use the brand new heart stencil, released on CHA2014. How did I just know it even before he published his proposed materials or finished tag? Mm mm intuition or logic?)


I loved the techniques and especially the chalkboard effect Tim used, but I did not have any of his new goodies in my stash. Sometimes I think that every now and then we make the mistake of thinking that we just have to buy all the new stuff and can't possibly live without it. However, not having it all, can also stretch our imagination, take us out of our comfort zone and feed our creativity. Saying that I am very pleased to be the owner of the new Eye Chart stencil. Yes, I am a confessed scrap-a-shop-aholic.  Surely, you can relate, can't you? Come on now, be honest, I'm not telling your significant other...

So here is my take on this month's challenge:


How To:


  1. For this month's tag, I did not even had to create a background, as I've just used one of the tags I previously used to mop up some of the leftover spray-ink on my craft sheet. It's a great way to make the most of your products and keep wastage to a minimum. Tags can always be used later, rather than merely wiping it off with a cloth, never to be seen again.
  2. Since I had no heart stencil to start with, I had to create my own by using a very small random heart punch  in my collection. I carefully punched 5 hearts out of a piece of leftover transparency.
  3. Instead of using distress ink and clear embossing powder, I decided to use my Distress Embossing pad directly on the stencil, onto my tag.
  4. I then used red embossing powder to create the embossed hearts on the bottom.  I carefully repeated this process, altering the position of the heats in each row. It did not work exactly as I anticipated, but it has a distressed feel, so I just highlighted the edges with my Fired Brick Distress Marker.
  5. The Eye Chart stencil was used to fill in the blank space above the hearts.
  6. To create a border, I used an X-cut border punch and covered it in Black Diamond Ice Stickles.
  7. I then cut a rosette, using the Tim Holtz Alterations die and again covered it with Black Diamond Ice Stickles.
  8. I also rediscovered some cardstock hearts, which I bought quite some time ago. I think it was Cre8tive, but I can be wrong, as I disposed of the packaging when I stored it with similar tags shapes. I covered two in Black Diamond Ice Stickles and the other in red WOW glitter. I added about 3 different layers of glitter to get a nice thick solid look.
  9. I then stamped Angle Wings on a piece of acetate with Staz On Black. Once dry, I fussy cut it and glittered the backing with Ice Stickels.
  10. While I waited for the glitter to dry I added a heart shaped eyelet at the top.
  11. I then glittered a piece of organza ribbon and waited till it dried before attaching it to my tag.
  12. I then added our wedding date with some rub-on letters from my stash. (also purchased a very long time ago)
  13.  I proceeded to create the foil words for my tag, using a texture plate I bought during my visit to South Africa in 2013. 
  14. To do this, put the texture plate face up on your multipurpose platform of your Big Shot or A plate.
  15. Put the foil colour side upwards on top of your texture plate and cover with embossing rubber and spacer plate. Finally add one cutting plate and roll through the machine. (Please note I played with different texture plates to make sure I get the words that best fit my tag)


  16. Using you Tim Holtz sander, carefully sand the embossed surface of your foil to reveal the silver words and cut.
  17. Since my words are all in Afrikaans, I decided to translate them for your purposes:
  18. EK LIEF JOU - I Love you
  19. JY's MYNE - You are mine
  20. Troudag -Wedding day
  21. When my embellishment pieces were finally dry I assembled it together and added a few feathers and charms. (Big thank you for the inspiration AngelaVenableArt, just loved your January Tag
  22. Finally I printed mini tags to add to finish it off.


Product List
Tags (3.5" x 5.5"): Kaszazz; News Agent
Ink: Staz On ink, Ranger Distress Ink -  Black Soot  
Stencil: - Tim Holtz Eye Chart
Texture Plate: Creaticca Studio (creaticcastudio@gmail.com)
Craft Metal: 
Creaticca Studio
Sanding Grip: Tim Holtz
Die: 
Tim Holtz Alterations
Border Punch: X-cut

Embossing Ink: Tim Holtz Distress Ink
Embossing powder: KaszazzIce Stickles - Ranger
Stamps:  Kaszazz
Glitter: WOW
Organza Ribbon:Kaszazz
Cardstock hearts: Cre8tiv
Trinkets
Eyelet
Rub on letters
Feathers


Friday, 3 January 2014

12 Tags of 2014 - January

Hello everyone

Welcome to my take on Tim Holtz's first tag challenge for the year. Since it's only the third of January I thought to join in the fun this year and create a tag each month. Being a bit of a rebel, not wanting to copy someone's else's work, my tag  looks nothing like his. I like to use the techniques I learn from artists like him and put my own spin to it, rather than attempting to recreate their work. I do however think that you'd agree that there is little doubt that his work has been the source of my inspiration. Without further ado please see his tag below, or visit his website at http://timholtz.com/12-tags-of-2014-january/, followed by my interpretation with instructions and the products I used:


Anguree's January tag:
Instructions:

  1. Punch a hole in the tag.
  2. Place the top of the tag onto the section of the embossing folder you like and emboss.
  3. Wipe your Distress embossing pad over the embossed images and add embossing powder. Heat set the embossing powder and repeat this step if needed.
  4. Spray the top of the tag with black Dylusions Ink and set aside to dry. 
  5. Use a blending tool and blend some Iced Spruce ink on the bottom of the tag.
  6. Using your blending tool sponge Archival Ink through the cracks of your Prima die. 
  7. Ink your Kaszazz Stamp only in the corner where the figure of the man is and stamp on scrap paper, proceeding stamping in the right corner of your tag. Re-ink the stamp and then stamp in dark black over the first image, so it gives a shadow effect.
  8. Distress the edges of the tag and ink with Black Soot Distress ink.

  9. Cut a clean, empty soda can with a PKTool or any suitable pair of scissors. Cut off both the top and bottom. Use gloves to protect your hands and practice caution as the aluminium has very sharp edges.


  10. Put the sheet of aluminum in the embossing folder. (Do not worry if it is not flat, it will flatten during the embossing process. Using the multi-purpose platform, put the embossing folder on tab 1 or 2, then add your rubber embossing mat and texture plate.  It might struggle a little, but it will go through. Repeat this process with the little section of the can that did not fit in the embossing folder by turning it around. Repeat with both embossing folders.
  11. Now use your weathered clock die and cut the clock frame from the embossed aluminium. Then cut your clock hands from the leftover piece. (I only passed it through once but had to break out some sections, so try to send it through twice, but be careful not to move the aluminium.) Note that some sections of the aluminium may crack, but since it's not an expensive resource, you can always emboss another if needed. 
  12. Now apply black liquid pearls to your clock hands and set aside to dry - this may take several hours, depending on the climate where you live.
  13. Place the clock on your tag and decide which half you would like to use. Cut in half when you are satisfied.
  14. Use a circle to cut the inside of the weathered clock.
  15. Use a blending tool to apply distress ink black suit over the embossed circle. It will just colour lightly. Now use black Archival Ink and wipe over the raised images. Dry with a heatgun.


  16. Once dry, place the circle and half of the clock on your tag. Once satisfied, stick both the embossed circle and clock on the tag. Turn over the tag and trim excess of the circle with a suitable pair of scissors.


  17. Punch a hole through the aluminium and tag with an appropriate tool such as a Crop-A-Dile.
  18. Cut a paper measure tape from the Tattered Time collection and cut the number 14 and 20 as two separate pieces, allowing enough space on the sides before the other numbers. Join the numbers with double sided tape and place on the tag, but do not stick it as yet.
  19. Stamp your words on black cardstock using embossing ink and emboss with silver embossing powder. Cut the words of your choice.
  20. Add 3D foam to the back of the words and arrange on the tag, with the measure tape before sticking it down.
  21. Add your paperclip and other trinkets.
  22. String the little iron cord through the tag ( I had to colour my original bronze one to silver using Patina Silver Ink)
  23. Add the clock arms with a silver brad once they are completely dry.

Product List
Tag (3.5" x 5.5"):Kaszazz
Cardstock: Sam & Lucy
Patterned Paper: Tim Holtz Tattered Time
Die: Tim Holtz Weathered Clock, Impress 3 in one Nesting Dies
Ink: Ranger Dylusion ink, Distress Ink - Iced Spruce & Black Soot, Patina, Ranger Archival Ink, Ranger Liquid Pearls
Embossing Folders: Tim Holtz Patchwork, Sizzix Clocks
Embossing Ink: Tim Holtz Distress Ink, 
Embossing powder: Silver
Stamps: Kaszazz
Stencils: Prima 
Trinkets: Kaszazz, Scrap Matrix
Stickers: Yuan Fei Lai Printing Co.LTD
3D Foam squares
Empty soda can
Paperclip


Monday, 30 December 2013

Inspiration Board Challenge 1


Hi Everyone

I am very excited to share my take on Scrapbook Creations Magazine's first Inspiration Board Challenge (December 2013). I just loved the colours and could not wait to get started. However, that was not until the Christmas break. The colours of this Board inspired me with happiness, peace, tranquillity. To suit the mood I used this dreamlike photo of myself, which almost gives you the idea that I'm staring into the future.


Detail images of this layout:

The Title:
All words were painted in white and covered with white glitter. To embellish it I have added small acetate butterflies which I created, using Cheery Lynn Designs small butterfly dies and Ranger Ice Stickles.


Butterflies: 
All the butterflies on this layout, except the big gold one at the bottom were handmade using Cheery Lynn Designs dies, Ranger Ice Stickles and Ranger Liquid Pearls.


Flower Detail:
Here I handmade the 3 metal flowers in the centre by using empty soft drink cans, Courture Creation's Frellis Embossing Folder and Tim Holtz Tattered Flowers die.


Product List:
16 x 16 inch Canvas
Chipboard:Enmarc Design Elements
Accetate: Kaszazz
Emty Softdrink cans
Glue: Helmar 450; Liquitex Heavy gel
Gesso: Studio Artist 
Ink Sprays: Ranger Dylusions, Helmar, Ranger Liquid Pearls, Tattered Angles
Paint: Studio Artist, Silks Acrylic glaze
Dies:Tim Holtz, Cheery Lynn Designs
Embossing Folder: Courture Creation's
Trinkets & Embellishments: Scrap Matrix, Finnabair, Kaizer Craft, Craft Bug, Crafter's Market
Glitter: American Crafts, Ranger


Monday, 23 December 2013

Beetle Days


Hi Everyone

Welcome to my very first post on The Scrap Yard. I thought it fit to share the layout on which I based the theme and design of this blog.


I was inspired by a photo of my mom in her early 20’s. At that stage, she just started working and loved her Beetle(s). In this layout I intended to show the contrast between the love for her vehicle and it’s unfortunate accident. The photo of the damaged car was covered in Crackle Accents to emphasize this idea and complete the unwritten words in the journaling.

Product List
Cardstock – Tim Holtz (Idea-ology – Lost and Found ); Sam and Lucy Premium Cardstock –Spotlight; backing chipboard packaging for album inserts
Chipboard – Scrap Matrix
Ribbon – Kaszazz; random pieces from my stash
Stamps – Prima Marketing; Jenny Elory (Sew Pretty, free with Cardmaking and Papercraft Magazine Issue 113)
Trinkets & Cogs (Finnabair; Scrap Matrix;  Kaszazz;  Jolee’s boutique – EK success
Brads (Prima Marketing ; Kaszazz)
Washi Tape- Scrap Matrix
Cotton sticky tape – Scrap Matrix
Archival Ink – Ranger (Black, Brown)
Distress Stain- Ranger (Chipped Sapphire; Vintage Photo; Dried Marigold)
Distress Ink – Ranger (Vintage photo; Antique linen; Frayed Burlap)
Pearl Lace – Spotlight
Wire Title – wire from hardware store, bended by hand
Big Shot – Sizzix
Dies: My Favourite Things Dynamics (Prima Donna Petals, Royal Roses;   Tim Holtz (Tattered Florals)
Glue- Helmar 450 Quick Dry Adhesive; Ranger Glossy Accents; Ranger Crackle Accents
Pearls – Kaiser Craft

Crafty tips used to apply to your own layouts:

·         Make your own flowers using a combination of die-cuts and colour them
      with 
spray ink to suit your colour scheme
·         Print your journaling on cotton tape for something different
·         Use Crackle Accents to support your message